We decided to run a WordPress website in high availability mode on Amazon Web Services (AWS). I created 3 AWS instances with a Multi-AZ RDS running MySQL, move the existing database, the only missing thing is to share WordPress file on all machines (for uploads and WP upgrades). NFS was no option for me as I had bad experiences with stale connections in the past, so I decided to go with GlusterFS.
What is GlusterFS?
As per Wikipedia: GlusterFS is a scale-out network-attached storage file system. It has found applications including cloud computing, streaming media services, and content delivery networks. GlusterFS was developed originally by Gluster, Inc., then by Red Hat, Inc., after their purchase of Gluster in 2011.
Volumes shared with GlusterFS can work in multiple modes as Distributed, Mirrored (multi-way), Striped, or combinations of those.
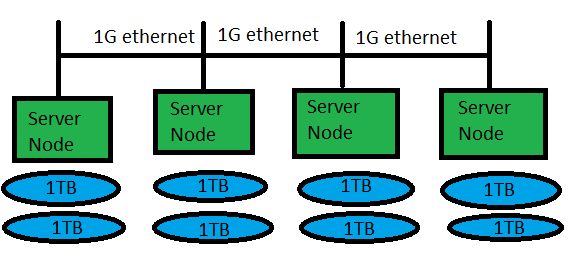
Gluster works in Server/Client mode, servers take care of shared volumes, clients mount the volumes and use them. In my scenario the servers and the clients are the same machines.
Preparation of Gluster nodes
1- Nodes will communicate on internal AWS network, so the following must go on each node’s /etc/hosts file:
XXX.XXX.XXX.XXX node-gfs1 # us-east-1b
XXX.XXX.XXX.XXX node-gfs2 # us-east-1d
XXX.XXX.XXX.XXX node-gfs3 # us-east-1d |
XXX.XXX.XXX.XXX node-gfs1 # us-east-1b
XXX.XXX.XXX.XXX node-gfs2 # us-east-1d
XXX.XXX.XXX.XXX node-gfs3 # us-east-1d
2- Create AWS EBS volumes to be attached on each instance. Node that it’s good to create each volume in the availability zone of the instance.
3- Open firewall ports on local network:
Note: To mount them locally (client on the same server machine), must open proper below or else the FS might be mounted read only, according to the following guidelines:
– 24007 TCP for the Gluster Daemon
– 24008 TCP for Infiniband management (optional unless you are using IB)
– One TCP port for each brick in a volume. So, for example, if you have 4 bricks in a volume, port 24009 – 24012 would be used in GlusterFS 3.3 & below, 49152 – 49155 from GlusterFS 3.4 & later.
– 38465, 38466 and 38467 TCP for the inline Gluster NFS server.
– Additionally, port 111 TCP and UDP (since always) and port 2049 TCP-only (from GlusterFS 3.4 & later) are used for port mapper and should be open.
Installation steps
On each machine: install GlusterFS (server and client)
# yum install centos-release-gluster37
# yum install glusterfs-server |
# yum install centos-release-gluster37
# yum install glusterfs-server
Then start the Gluster server process and enable it on boot:
# systemctl start glusterd
# systemctl enable glusterd
Created symlink from /etc/systemd/system/multi-user.target.wants/glusterd.service to /usr/lib/systemd/system/glusterd.service.
# |
# systemctl start glusterd
# systemctl enable glusterd
Created symlink from /etc/systemd/system/multi-user.target.wants/glusterd.service to /usr/lib/systemd/system/glusterd.service.
#
From first node: establish Gluster cluster nodes trust relationship:
# gluster peer probe node-gfs2
peer probe: success.
# gluster peer probe node-gfs3
peer probe: success. |
# gluster peer probe node-gfs2
peer probe: success.
# gluster peer probe node-gfs3
peer probe: success.
Now check the status of peer commands:
# gluster peer status
Number of Peers: 2

Hostname: node-gfs2
Uuid: 2a7ea8f6-0832-42ba-a98e-6fe7d67fcfe9
State: Peer in Cluster (Connected)

Hostname: node-gfs3
Uuid: 55b0ce72-0c34-441f-ab3c-88414885e32d
State: Peer in Cluster (Connected)
# |
# gluster peer status
Number of Peers: 2
Hostname: node-gfs2
Uuid: 2a7ea8f6-0832-42ba-a98e-6fe7d67fcfe9
State: Peer in Cluster (Connected)
Hostname: node-gfs3
Uuid: 55b0ce72-0c34-441f-ab3c-88414885e32d
State: Peer in Cluster (Connected)
#
On each server: prepare the volumes:
# mkdir -p /glusterfs/bricks/brick1
# mkfs.xfs /dev/xvdf |
# mkdir -p /glusterfs/bricks/brick1
# mkfs.xfs /dev/xvdf
Add to /etc/fstab:
UUID=8f808cef-c7c6-4c2a-bf15-0e32ef71e97c /glusterfs/bricks/brick1 xfs defaults 0 0 |
UUID=8f808cef-c7c6-4c2a-bf15-0e32ef71e97c /glusterfs/bricks/brick1 xfs defaults 0 0
Then mount it
Note: If you use the mount point directly I get the error:
# gluster volume create wp replica 3 node-gfs1:/glusterfs/bricks/brick1 node-gfs2:/glusterfs/bricks/brick1 node-gfs3:/glusterfs/bricks/brick1
volume create: wp: failed: The brick node-gfs1:/glusterfs/bricks/brick1 is a mount point. Please create a sub-directory under the mount point and use that as the brick directory. Or use 'force' at the end of the command if you want to override this behavior. |
# gluster volume create wp replica 3 node-gfs1:/glusterfs/bricks/brick1 node-gfs2:/glusterfs/bricks/brick1 node-gfs3:/glusterfs/bricks/brick1
volume create: wp: failed: The brick node-gfs1:/glusterfs/bricks/brick1 is a mount point. Please create a sub-directory under the mount point and use that as the brick directory. Or use 'force' at the end of the command if you want to override this behavior.
So create under each /glusterfs/bricks/brick1 mount point a directory used for GlusterFS volume, in my case I created /glusterfs/bricks/brick1/gv.
From server 1: Create a 3-way mirror volume:
# gluster volume create wp replica 3 node-gfs1:/glusterfs/bricks/brick1/gv node-gfs2:/glusterfs/bricks/brick1/gv node-gfs3:/glusterfs/bricks/brick1/gv
volume create: wp: success: please start the volume to access data
# |
# gluster volume create wp replica 3 node-gfs1:/glusterfs/bricks/brick1/gv node-gfs2:/glusterfs/bricks/brick1/gv node-gfs3:/glusterfs/bricks/brick1/gv
volume create: wp: success: please start the volume to access data
#
Check the status:
# gluster volume info

Volume Name: wp
Type: Replicate
Volume ID: 34dbacba-344e-4c89-875f-4c91812f01be
Status: Created
Number of Bricks: 1 x 3 = 3
Transport-type: tcp
Bricks:
Brick1: node-gfs1:/glusterfs/bricks/brick1/gv
Brick2: node-gfs2:/glusterfs/bricks/brick1/gv
Brick3: node-gfs3:/glusterfs/bricks/brick1/gv
Options Reconfigured:
performance.readdir-ahead: on
# |
# gluster volume info
Volume Name: wp
Type: Replicate
Volume ID: 34dbacba-344e-4c89-875f-4c91812f01be
Status: Created
Number of Bricks: 1 x 3 = 3
Transport-type: tcp
Bricks:
Brick1: node-gfs1:/glusterfs/bricks/brick1/gv
Brick2: node-gfs2:/glusterfs/bricks/brick1/gv
Brick3: node-gfs3:/glusterfs/bricks/brick1/gv
Options Reconfigured:
performance.readdir-ahead: on
#
Now start the volume:
# gluster volume start wp
volume start: wp: success
# |
# gluster volume start wp
volume start: wp: success
#
Check the status of the volume:
# gluster volume status
Status of volume: wp
Gluster process                             TCP Port  RDMA Port  Online  Pid
------------------------------------------------------------------------------
Brick node-gfs1:/glusterfs/bricks/brick1/
gv                                          49152     0          Y       10229
Brick node-gfs2:/glusterfs/bricks/brick1/
gv                                          49152     0          Y       9323
Brick node-gfs3:/glusterfs/bricks/brick1/
gv                                          49152     0          Y       9171
NFS Server on localhost                     2049      0          Y       10249
Self-heal Daemon on localhost               N/A       N/A        Y       10257
NFS Server on node-gfs2                     2049      0          Y       9343
Self-heal Daemon on node-gfs2               N/A       N/A        Y       9351
NFS Server on node-gfs3                     2049      0          Y       9191
Self-heal Daemon on node-gfs3               N/A       N/A        Y       9199

Task Status of Volume wp
------------------------------------------------------------------------------
There are no active volume tasks

# |
# gluster volume status
Status of volume: wp
Gluster process TCP Port RDMA Port Online Pid
------------------------------------------------------------------------------
Brick node-gfs1:/glusterfs/bricks/brick1/
gv 49152 0 Y 10229
Brick node-gfs2:/glusterfs/bricks/brick1/
gv 49152 0 Y 9323
Brick node-gfs3:/glusterfs/bricks/brick1/
gv 49152 0 Y 9171
NFS Server on localhost 2049 0 Y 10249
Self-heal Daemon on localhost N/A N/A Y 10257
NFS Server on node-gfs2 2049 0 Y 9343
Self-heal Daemon on node-gfs2 N/A N/A Y 9351
NFS Server on node-gfs3 2049 0 Y 9191
Self-heal Daemon on node-gfs3 N/A N/A Y 9199
Task Status of Volume wp
------------------------------------------------------------------------------
There are no active volume tasks
#
This is a healthy volume, if one of the servers goes offline it will disappear from the table above and reappears when it’s back online. Also peer status will be disconnected (from gluster peer status command).
Using the volume (Gluster clients)
Mount on each machine: In server 1 I will mount from server 2, from server 2 i will mount from server 3, from server 3 I will mount from server 1.
Using the syntax in /etc/fatab:
node-gfs2:/wp /var/www/html glusterfs defaults,_netdev 0 0 |
node-gfs2:/wp /var/www/html glusterfs defaults,_netdev 0 0
Repeat it on each server as per my above note.
Now /var/www/html is shared on each machine in read/write mode.
References
- http://severalnines.com/blog/scaling-wordpress-and-mysql-multiple-servers-performance
- http://www.slashroot.in/gfs-gluster-file-system-complete-tutorial-guide-for-an-administrator
- https://wiki.centos.org/HowTos/GlusterFSonCentOS